Registration Guide DNEX
Last updated: September 2025
Complete step-by-step guide to register on DNEX. Includes KYC, 2FA and account security.
Quick Registration Steps
Why Choose DNEX?
Licensed in Vietnam
First crypto exchange in Vietnam
Low Trading Fees
Starting from 0.1% with discounts
Advanced Security
Industry-leading security measures
Detailed Registration Guide - How to Register DNEX Step by Step
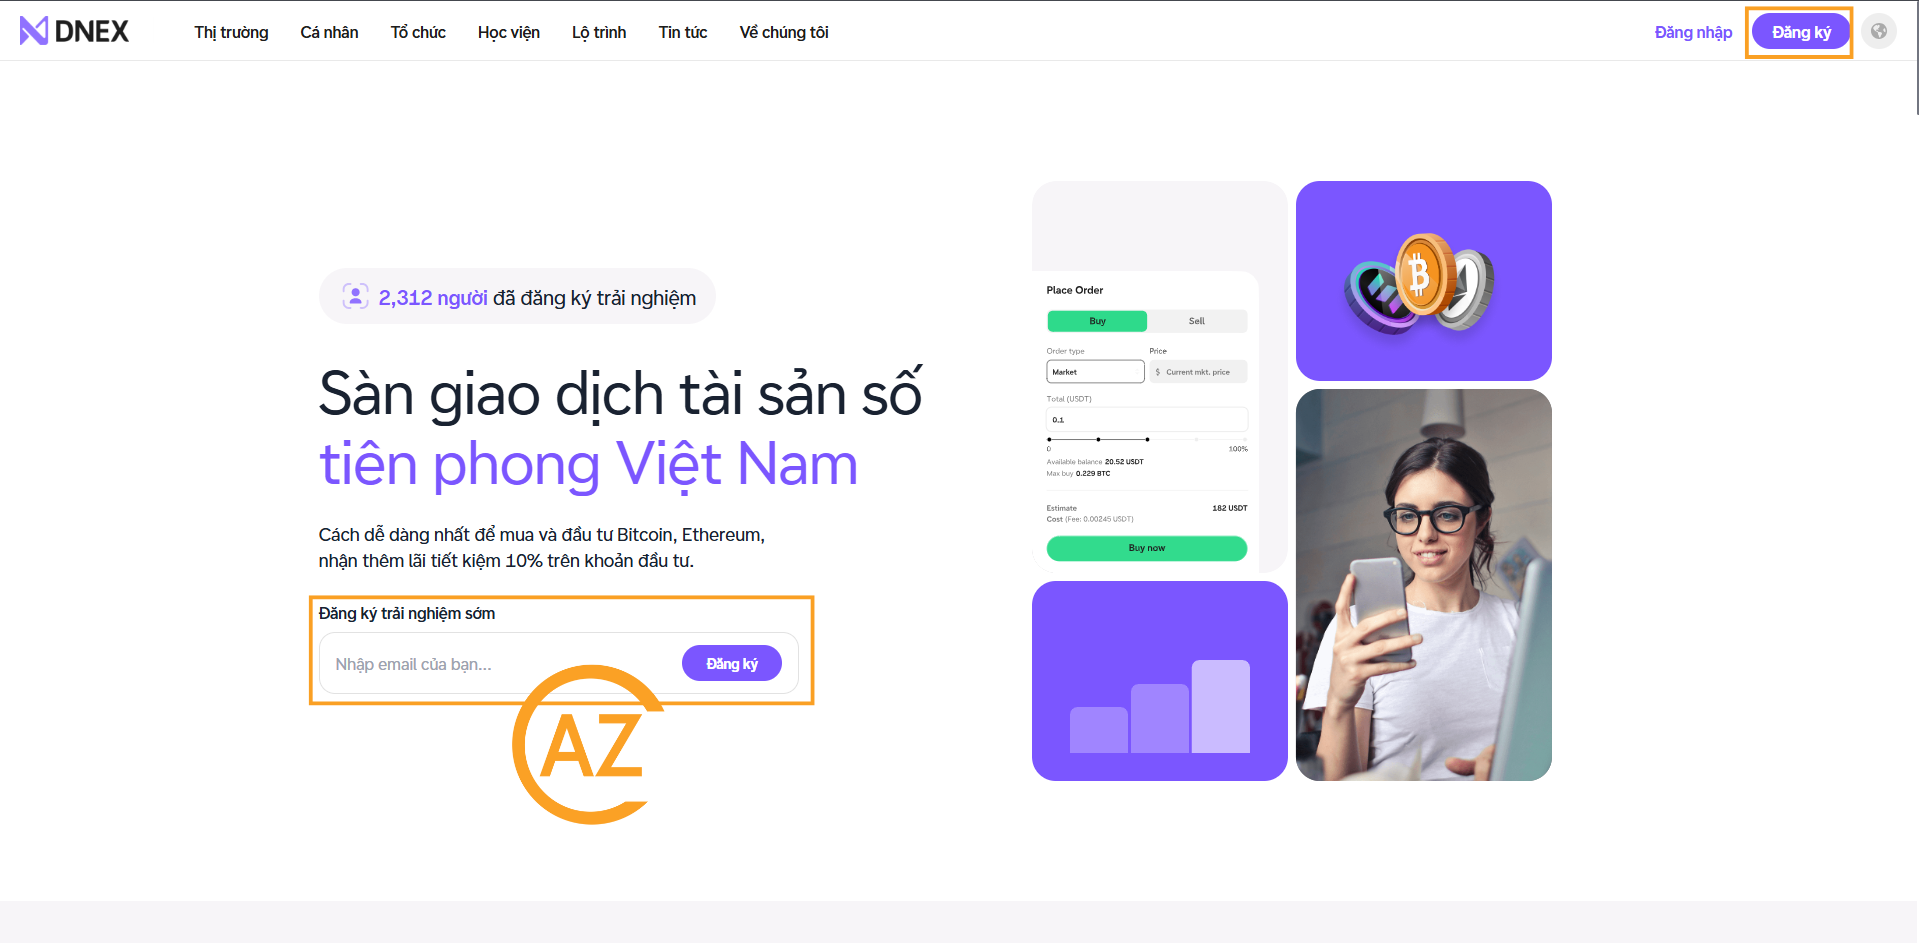
1Visit DNEX Website
Visit the DNEX homepage and select Register or use the following link:
https://dnex.com.vn/signup
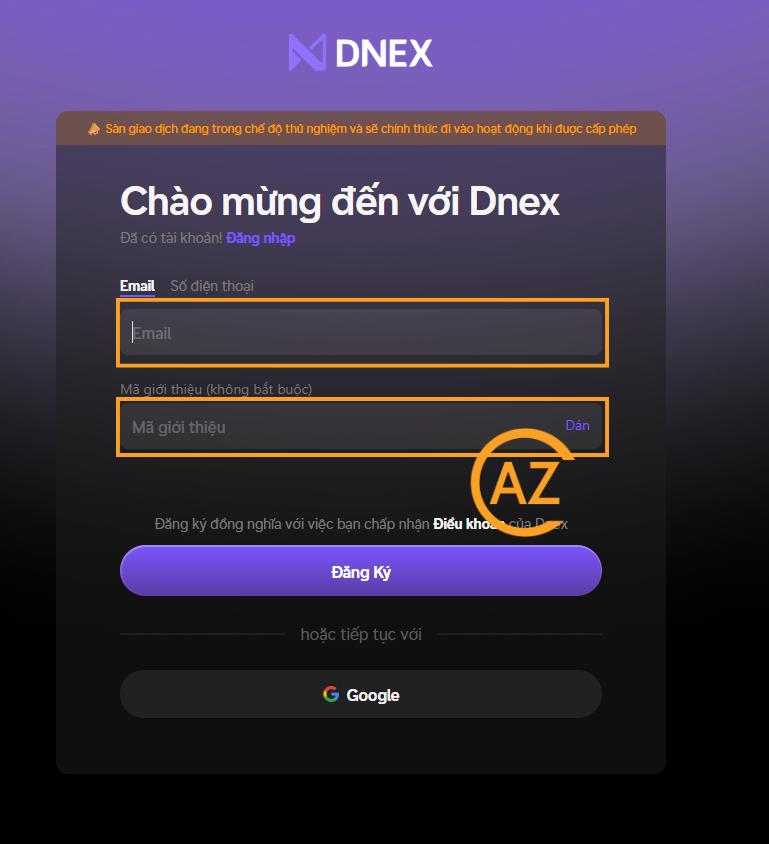
2Register
Select Register by email/phone. Or you can select Register by Google below. Then press Register. And enter referral code 0HMBGRWV to receive 10% trading fee discount.
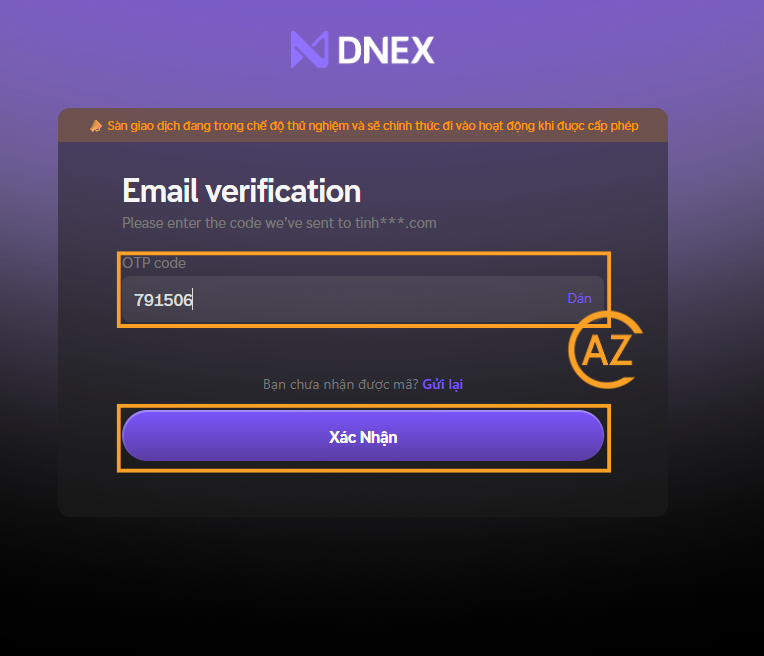
3Verify email
Then you will receive an email verification containing 6 digits. Enter the digits into the OTP code and select Verify.
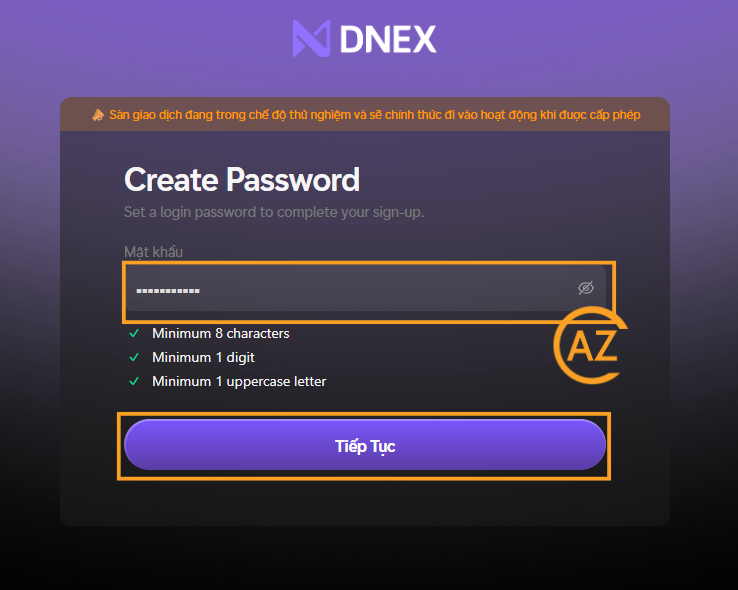
4Set Password
Then, enter your password (Note: Choose a password with letters, numbers, uppercase letters and special characters to enhance account security) and select Next.
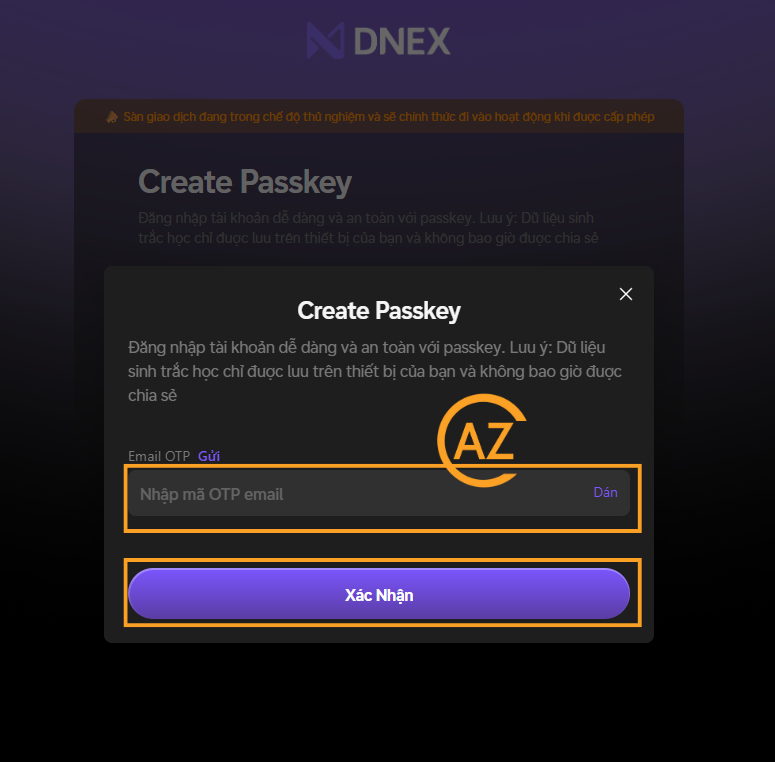
5At this step, you can skip to complete later, but it is recommended to create a passkey
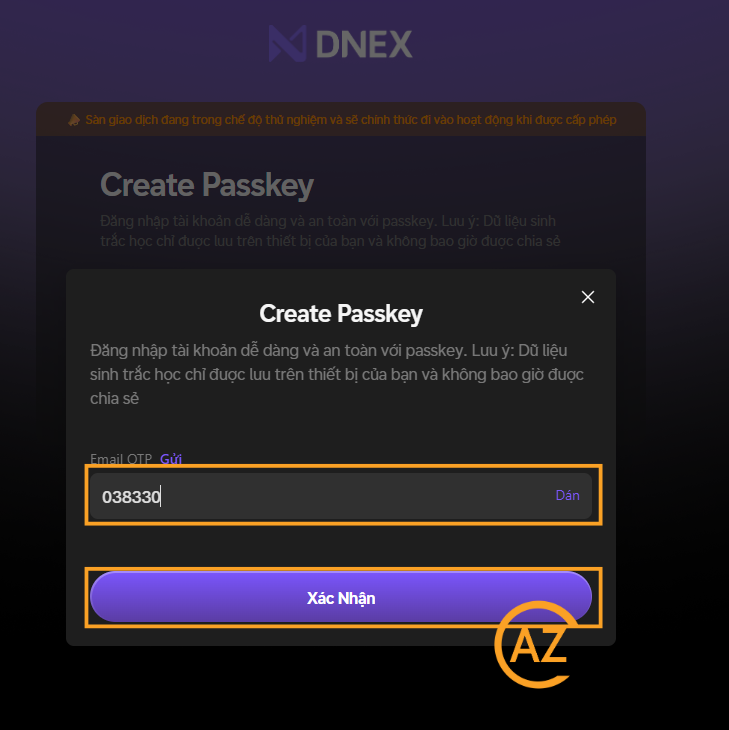
Select Send and enter the OPT code sent to your email. Then press Verify.
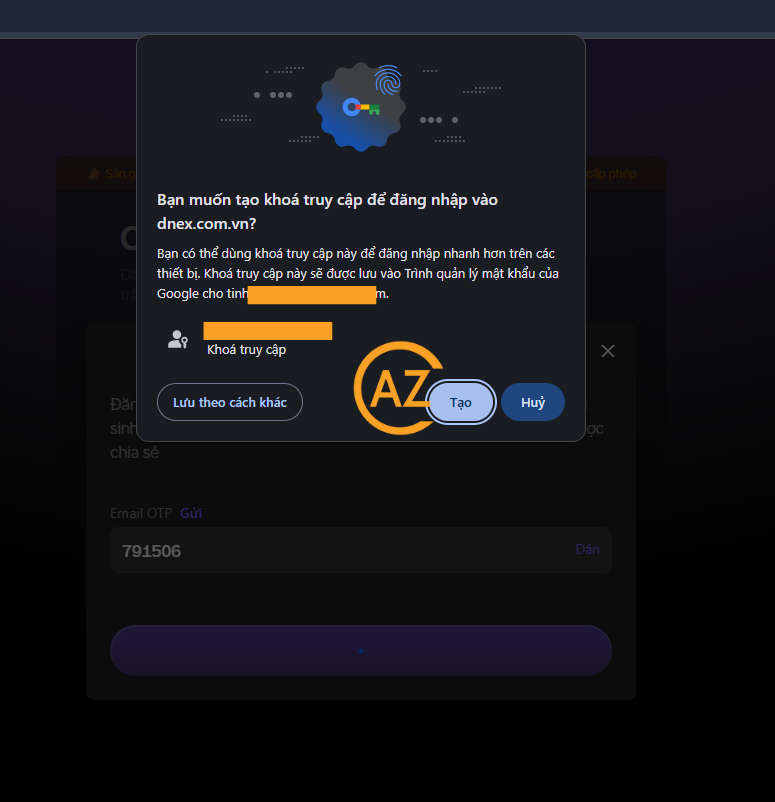
6Confirm create passkey
Confirming to create passkey will help you easily login quickly on devices, while securing your password. When you agree, press Create.
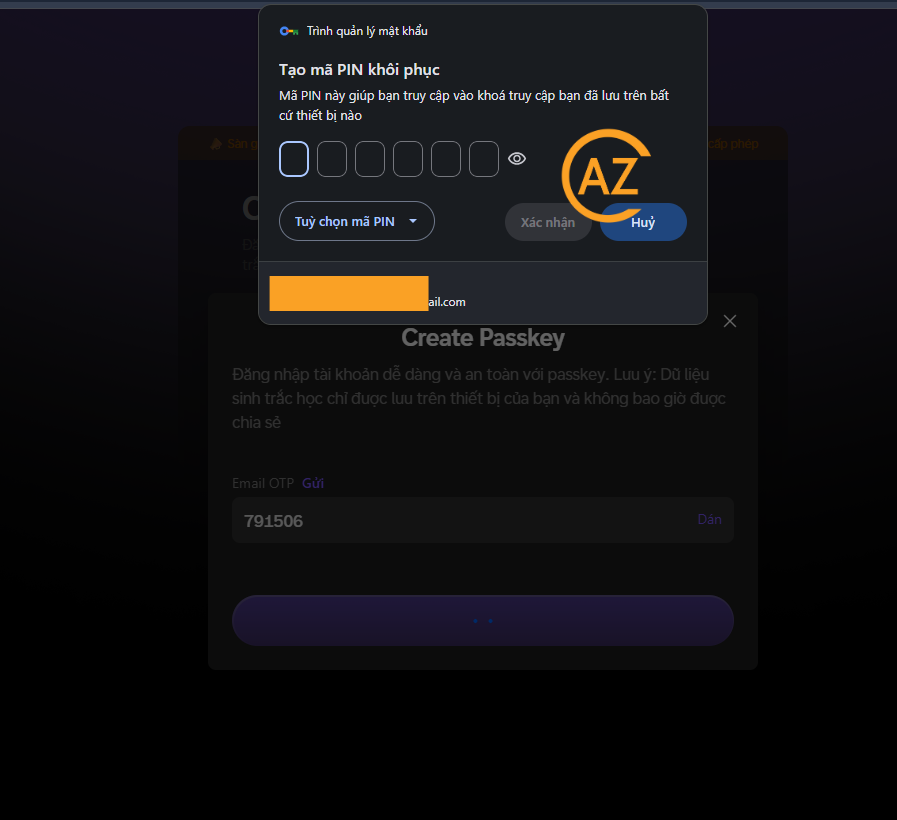
7Create recovery PIN
Enter the 6-digit recovery PIN (Note: Choose a PIN that is easy to remember but not easy to guess). When you agree, press Verify.
8Complete create passkey
Select Send and enter the OPT code sent to your email. Then press Verify.
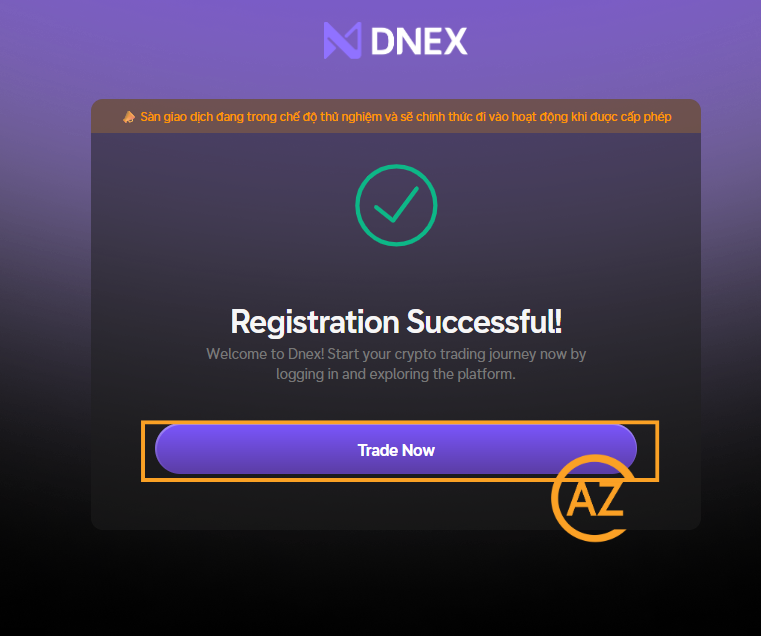
9Successfully create DNEX account
Congratulations on successfully creating the first crypto exchange account in Vietnam. Start scrolling.
Security Setup
Secure your account with KYC verification and 2FA authentication
KYC Verification
Complete identity verification to increase withdrawal limits and access all features.
2FA Authentication
Add an extra layer of security with Google Authenticator or SMS verification.
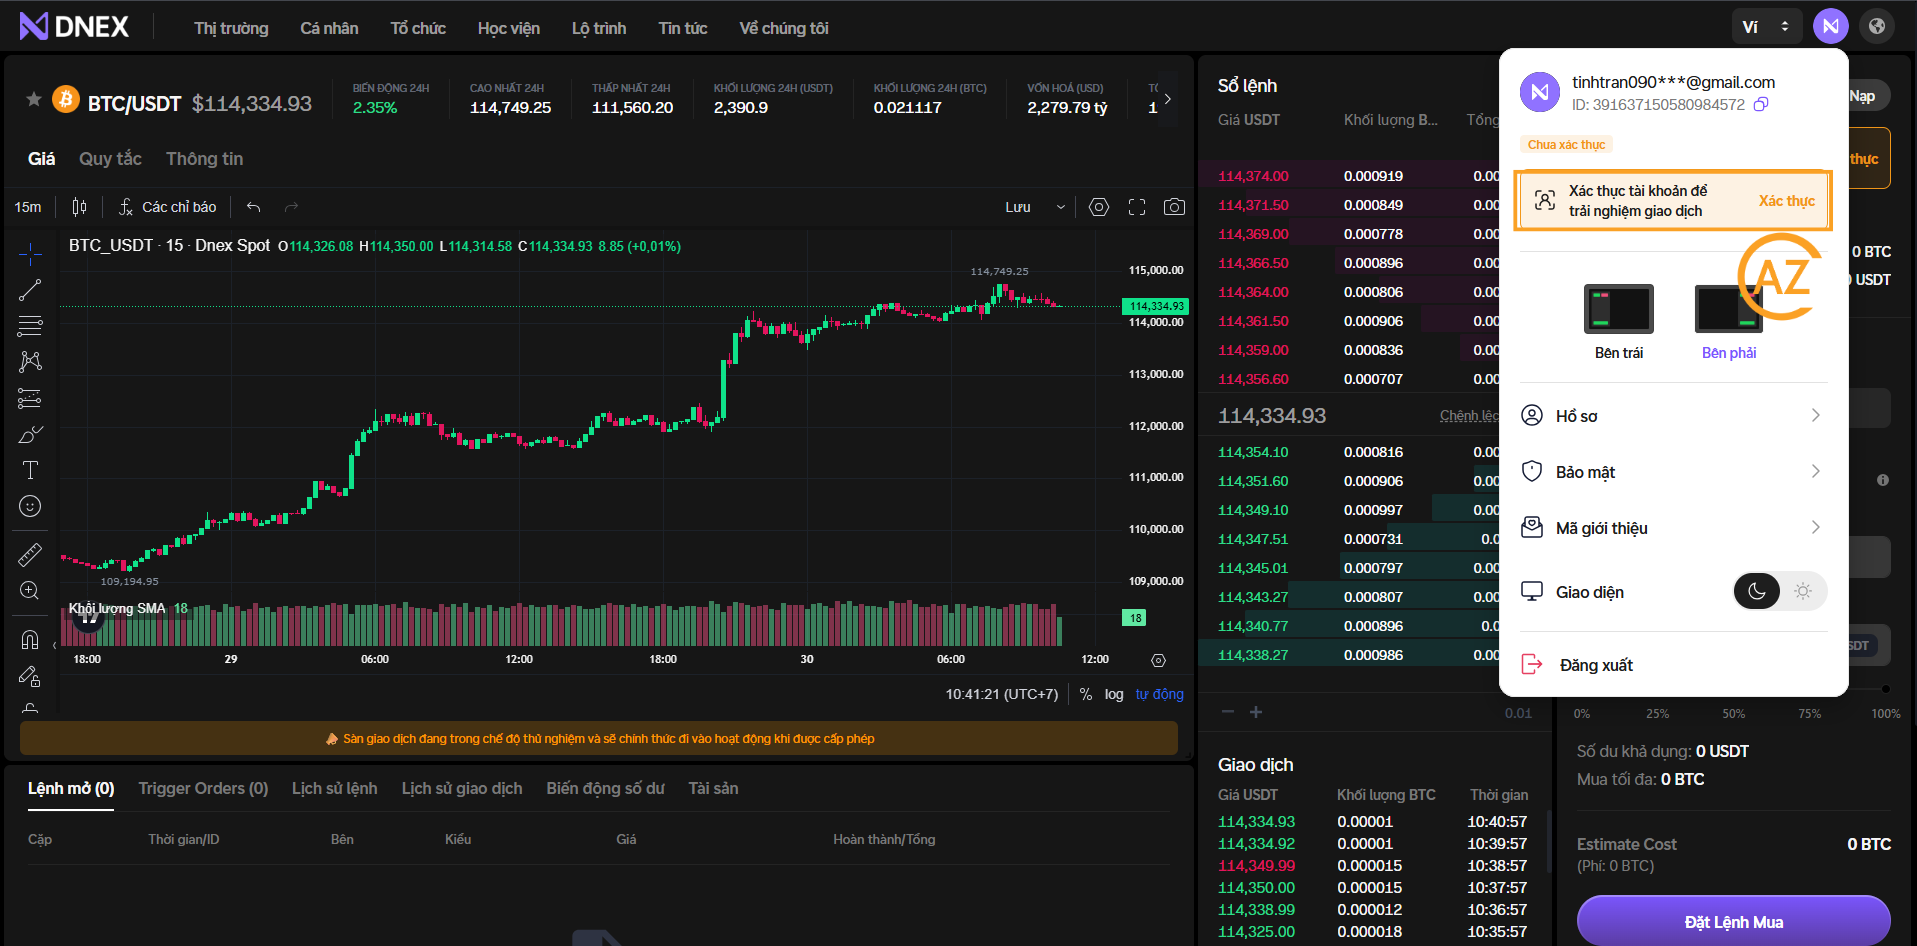
1KYC Verification
Open the DNEX website and select Verification.
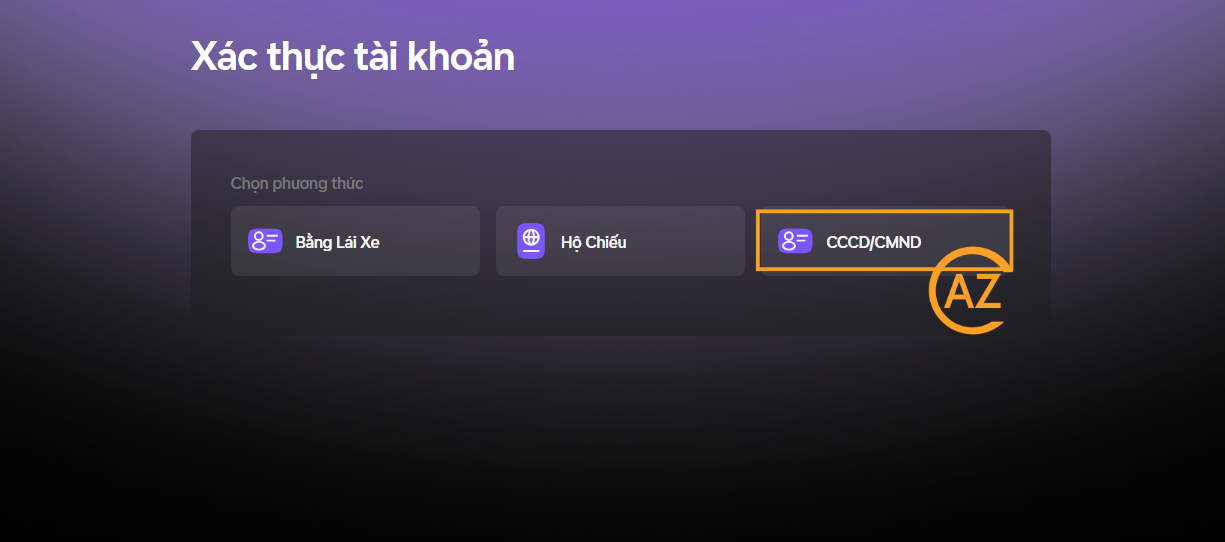
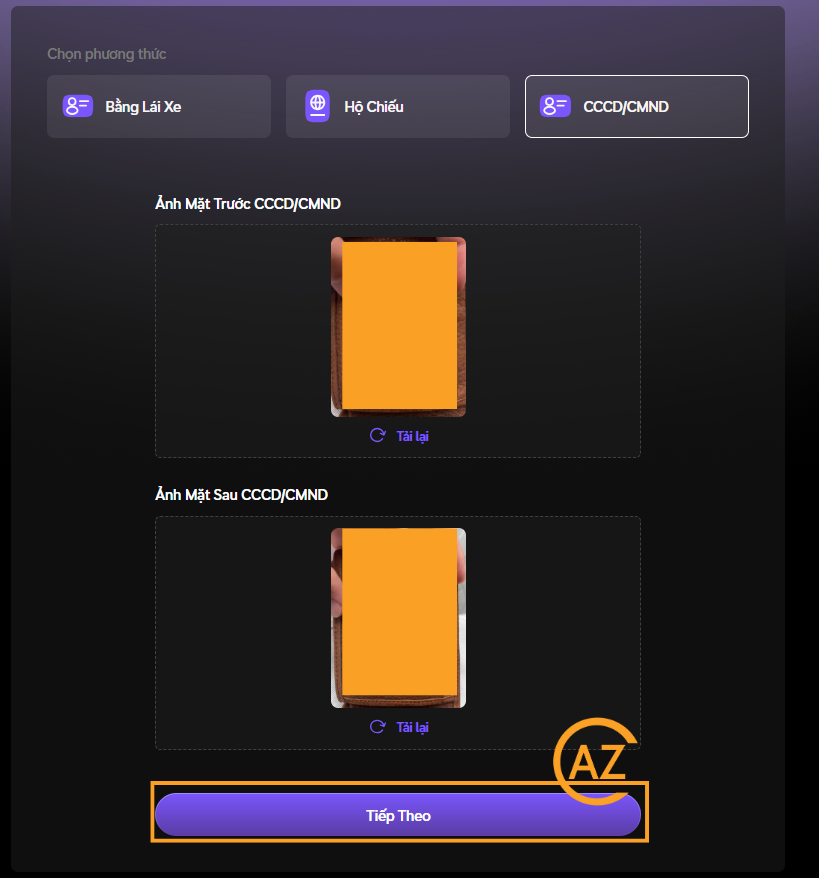
2Select document type
Select document type (here I will choose CCCD to guide).
3Upload document
Upload your document, both front and back. Then press Next.
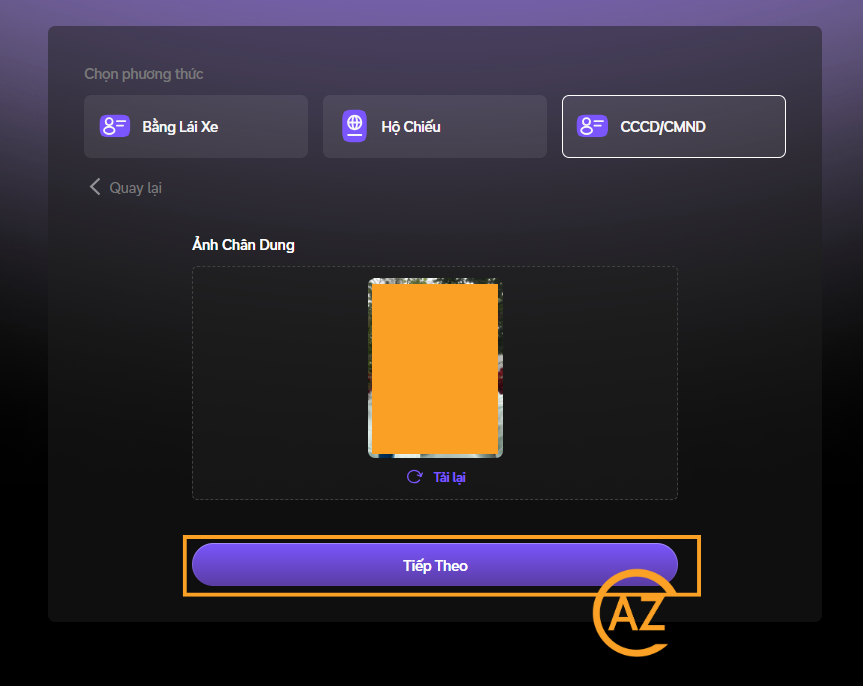
4KYC Verification and complete
Upload your photo. Then press Next. Finally press Send to complete.
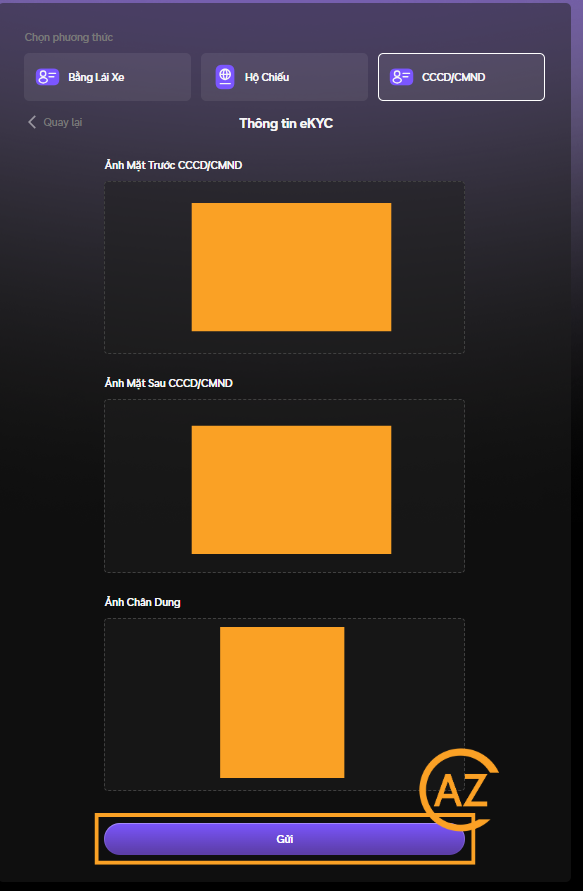
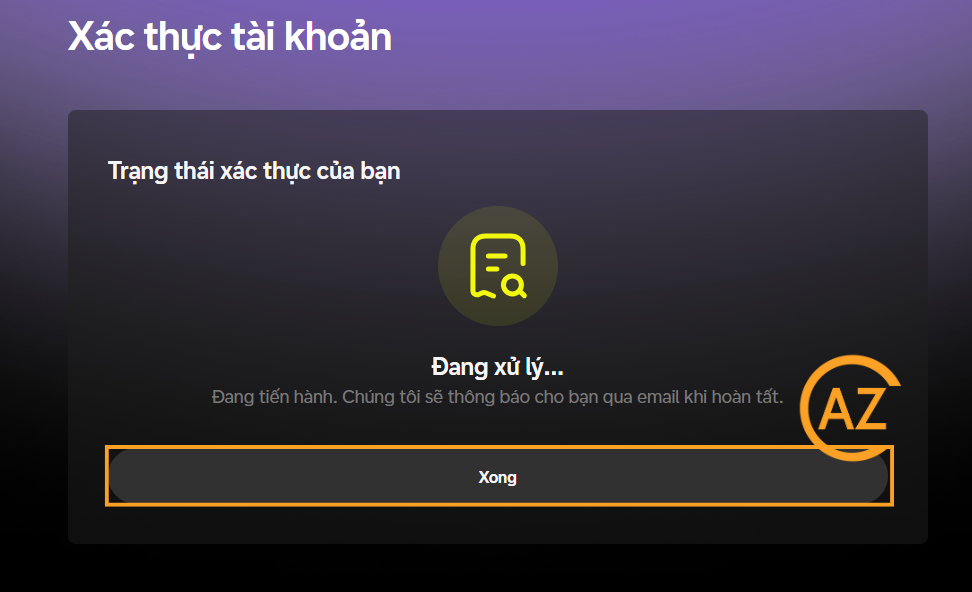
5Wait for verification
The processing time will depend on the quality of the photo you upload, press Done to continue the next activities.